A Guide to Construction Site Snow Removal and Protection

Cold temperatures can put workers at risk of fall or exposure injuries, and unexpected freezes can damage equipment or materials at your site. Some companies can shut down in the “off-season” until the last blizzard of the spring, but that’s not always possible or preferable.

In New England, removing snow can seem like a nearly full-time occupation come the first winter vortex.

Being able to protect your site, or thaw and remove snow and ice as quickly as possible, is key to protect employees, gear, and your site.

On top of the safety necessity of snow removal and protection, keeping it from piling up in the first place and removing it safely and easily can be a critical factor in preventing avoidable weather delays.

Site-Protection Tactics for the Winter

Protecting equipment, tools, and workers from the elements is an important first step. Taking basic precautions keeps costs down and helps to avoid unnecessary maintenance costs. For example:

  • Keeping equipment and tools inside when possible
  • Covering any outside equipment and tools with sheeting or snow tarps
  • Using antifreeze for any equipment and tools that need it
  • Making sure fluids in your equipment are rated for your area’s temperatures and replace if needed
  • Taking steps to warm up and test equipment and tools before use
  • Keeping sensitive materials, such as adhesives, concrete, shingles, paint, caulk, resins, and epoxies, inside or otherwise protected

Winter Accessories and Apparel

Outfitting your crew with appropriate accessories makes it easier for workers to handle equipment in the cold and prevents injuries and delays.

Before winter gets here, consider providing your crew with accessories such as:

  • Winter Jackets
  • Winter Gloves
  • Hard Hat Liners
  • Face Protection
  • Winter Work Boots

Job-Site Equipment and Supplies for Cold Weather

While often overlooked, ensuring you are prepared with the right supplies each winter keeps you from getting caught unawares by the first major storm. For example:

Snow Removal for Jobsites

Even with the best planning and gear, snow is often unavoidable in a lot of areas of the country. The Pro Group also carries a range of winter snow-removal equipment and supplies to aid with melting and removing snow as quickly as possible.

For example, for snow protection, we carry a range of ice melts.

For snow removal, we offer protective Eagle Industries Snow Removal Tarps, which can avoid hundreds of man-hours from manually removing fresh snow.

Before leaving the site, workers cover all equipment and working surfaces with the snow tarps. In the morning, small poly tarps can be lifted from the site by hand, while large poly tarps can be lifted via crane, quickly removing snow to prevent wasted time and energy.

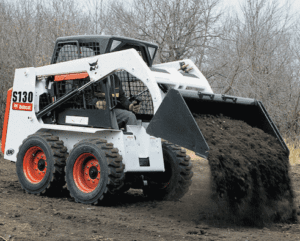
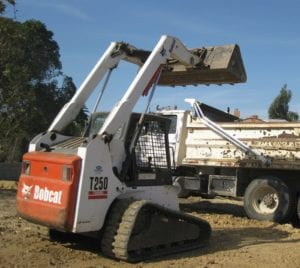
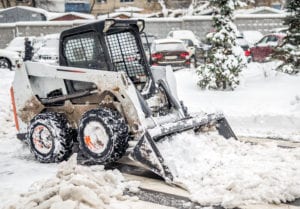
For larger sites or when you need to move old snowpack, we also offer a range of snow movers and snow plow/pusher attachments.

Keep Your Jobsite Protected This Winter

The Pro Group has your winter jobsite protection needs this season to keep your site operating on-schedule and safely. Whether you’re interested in snow removal tarps or want to look into a variety of equipment, tools, accessories, and educational resources for winter construction, we’re here to answer any questions you have – contact us here.

We can set you up with the construction equipment and materials you need to work through the winter with a minimum of weather-related delays and hardships. Request a quote for rent or supply.

Dewatering Pumps: 5 Things You Should Consider

If you need to lower the water table below an excavation, keep water out of foundations, pits, or tunnels, or just need to dry solid materials at your site, you’ll need a dewatering solution.

There are a lot of choices out there, from submersible dewatering pumps to towable diaphragm pumps, electric trash pumps and more.

The type you’ll need varies depending on how much liquid you need to move, and how fast, as well as factors like what the liquid is and how far you’ll need to lift it. Sludge and debris require different pumps than you’d need to move lighter materials like rainwater and wood debris.

So, how do you know you’re choosing the right one for your job?

Here are five things you need to consider when choosing a dewatering pump:

1. What’s in the Water You Need to Move?

Water almost never comes alone – almost always, your dewatering system will also need to move gravel, sand, mud, or even trash. The amount of sediment and other debris in the water you need to move determines the kind of pump you’ll need.

If you need to move heavy materials like gravel and mud…

You’ll need a pump that can handle solids. Trash pumps are usually centrifugal pumps that have a large

discharge opening to avoid clogs. Heavier solids may require a shredder.

BJM Pumps

Diaphragm trash pumps like the Wacker Neuson Diaphragm Trash Pump PDT2 come in gas and diesel-powered models and are often ideal for these situations.

If your site only has light materials like sand, rainwater, and wood…

A simpler electric dewatering pump can do the job of moving clear water and water with light sediment and natural debris. For example, BJM R Series submersible dewatering pumps work well to lift light debris.

2. How Much Water Do You Need to Move, and How Fast?

The size of your pump is also an important consideration for keeping your site and workers safe.

Undersized pumps run the risk of flooding your job site when they can’t keep up with demands.

As a general rule, the bigger the piping and the larger the motor, the more water you’ll be able to move, and the faster it will work, but more isn’t always better – if you oversize your pump, you can pump the site dry and burn out the motor.

Pumps running significantly outside their ideal flow levels also can cavitate, which wears seals and bearings.

Calculating the ideal flow rate, in gallons per minute, will help you find the right pump – for help with this, contact our expert technicians.

How far does the water need to go?

You’ll also need to keep in mind where the water is going. The vertical distance you have to move liquid affects which type of hosing or piping you’ll need.

If you’re pumping into a tank or up high, you’ll need to consider friction loss, which reduces the effectiveness of a pump. As the static head (or distance you need to lift liquid upwards) increases, so does the amount of pressure that you’ll need to keep up with the inflow.

3. Choose the Right Type of Pump: Centrifugal vs. Displacement Pumps

Most dewatering pumps use centrifugal force or displacement to move water.

Centrifugal Pumps

Centrifugal water pumps use rotation to move water into the pump and pressurize the discharge flow. On most construction sites, centrifugal water pumps are a tool of choice.

Standard, trash, and submersible models are all typically centrifugal pumps.

These pumps are highly versatile and work well to move all thin liquids quickly. They also need to be filled with the liquid before use to work well. Low flow can damage the impeller, as can solids.

Positive Displacement/Rotary Pumps

Positive displacement water pumps typically use a diaphragm which contracts to pull liquids into the pump. They typically are used for very dense, viscous liquids with a lot of solids.

Though they can produce high pressure and aren’t as vulnerable to low flow, they tend to be more expensive and slower than centrifugal pumps.

4. Gas vs. Electric Pumps

Dewatering typically occurs early on during a project; there likely won’t be a built-in power supply on site.

Dewatering pumps come in both gas/diesel fuel powered and electric options.

If you’ll need to dewater your site for an extended period of time, an electric pump you can hook up to a permanent power source is probably your best bet. Electric engines also need less maintenance and can be less expensive to run depending on current fuel prices.

If the power source will be temporary, a diesel-driven pump is probably a better choice.

5. Submersible vs. Self-Priming Pumps

The best pump choice for construction is usually a submersible pump. Submersible “incapsulated” pumps can be completely submerged in liquid and work to effectively remove both liquids and solids suspended in the liquid from your site.

“Self-priming” pumps are smaller and can be more portable and easier to use, but they also tend to leave dewatered solids in the pit and stall frequently. Especially as the distance, your suction hose has to travel increases, self-priming pumps quickly become more expensive and time-consuming than they’re worth.

How to Find the Right Submersible Water Pump

There are several important factors to consider when choosing a water pump:

  • Type of liquid and how fast you need to move it
  • Your power source – gas or diesel? How big is your generator?
  • How far your liquid needs to be moved
  • What type of pump will best suit your site’s needs

A dewatering expert can be helpful in assessing the proper approach to match job site conditions. Pro Tool & Supply has all these dewatering situations covered – we carry a variety of pumps and accessories from top brands like BJM, Tsurumi, and Wacker Neuson.

Want more information, or need help figuring out which dewatering tool is best for you? Our team is happy to walk you through the selection process. Contact our expert technicians for product information or request a quote here.

How to Get Maximum Impact from Your Trench Roller

Trench rollers are particularly well suited for compacting cohesive soils under excavations, roads, and parking lots.

Compaction works by removing air pockets from the soil, and when you need to compact soil in tight spaces, trench rollers are the best tool for the job.

Trench rollers essentially punch the dirt and vibrate it, making it denser by shaking the particles into closer alignment. This process helps eliminate settling, cracking, and heaving when building driveways, sidewalks, floors, foundations, and walls.

Once soil is properly compressed, it holds a lot more weight. This is critical to prevent surprise “voids” in the soil which cause defects after a project concludes.

Here’s a quick guide to make sure you’re maximizing your investment, choosing the safest and most effective option, and getting the best trench roller for your project.

Things to Consider When Looking for a Vibratory Compactor

Trench Width

The key advantage of a trench compactor is its maneuverability in tight spots.

Depending on your project, you can choose between several widths to minimize the number of passes you need, while choosing a model small enough to maneuver easily, even through the narrow trenches you need to compact. Some models also have built-in sensors to let you know when you’ve achieved the density required for your project.

Safety

Trenches made in loose soil are often prone to collapse. In the past, when compactors had to be pushed manually through a site, this posed significant additional risk. Today, many options for trench rollers are remote-controlled from a distance effectively increasing site safety.

Most also offer built-in safety features such as an automatic shutoff when the trench roller senses that the operator is too close, or when another object collides with the roller.

For example, The Pro Group offers a built-in safety feature in its trench rollers which includes a prominently placed infrared receiving eye on top. This ensures that the remote-control contact is maintained permanently, even in trench shoring.

Compared to previous models, modern rollers also have enhanced stability over uneven terrain, improving their reliability.

Soil Type

Most rollers are either “sheepsfoot” rollers or smooth rollers. Deciding which is better for you depends on your project and the soil type.

If you are working in clay-heavy soil, or another cohesive substate, a sheepsfoot trench roller effectively mixes these layers together to achieve better compaction.

On the other hand, smooth rollers run over the layers without mixing them. They work best on granular materials like sand or gravel.

Pro Tool offers a wide range of compaction rollers suited to every task. You can check out our fleet of cutting-edge walk-behind rollers, trench rollers, and other vibratory rollers in various sizes and weights here.

Whether you are looking to rent or buy, our experts can walk you through the selection process by helping you find the right compaction equipment fit for your job.

Request a quote here or call us today at 1-844-671-2953 to speak with a representative.

Things To Look For in a Construction Equipment Rental Company

Renting construction equipment gives you the best tools available to get your job done – without the cost of buying, maintaining, and storing them.

There are a lot of rental companies out there and finding the right one can mean the difference between smooth sailing and a stalled project.

With that in mind, here’s our quick guide to what to look for in a construction rental company, so you:

  • Get the most value for your money
  • End up with the right tools
  • Get your project finished on schedule

On-Site Delivery

Even the best tools are useless if they aren’t there right when you need them. Construction timelines are often tight, making orchestrating the timing of equipment arrival and pickups a complex puzzle.

Before agreeing to a rental contract, make sure you ask:

  1. Whether availability is guaranteed, and
  2. How pickups are scheduled.

At The Pro Group, we take care of on-site delivery and pickup for you – just tell us when, and we’ll be there ready with the equipment when you need it. We can often deliver equipment within one day, stock allowing.

Tool and Supply Bundles

Avoid the hassle of multiple vendors to reserve all your equipment, tools, and supplies by choosing a company that can serve as a one-stop shop for everything you’ll need.

Pro Tool and Supply offers a wide range of construction tools and supplies. We also bundle tools and supplies with our equipment rentals for maximum convenience and deliver them free of charge.

Product Expertise and On-Site Demos

Renting equipment lets you stay on the cutting edge of technology, without making a huge investment every time a new model comes out.

The Pro Group aims to stay at the forefront of the best equipment. Often, our models are the latest on the market – and this means that a lot of our customers aren’t yet familiar with how to operate them.

Luckily, we have an extensively trained staff at The Pro Group on hand to provide high-quality safety and product information. You can check out some of our certifications and associations here.

Any one of our products can be sent out with a sales representative to be demoed before purchase or rent. We offer demos of:

  • Husqvarna Surface Preparation Machines
  • Fomo Products– Spray foam for windows, doors, voids and cavities
  • Powder Actuated Tools– for fastening into concrete
  • Diamond Chain Saws and Ring Saws
  • Safety Equipment– Fall Protection Systems
  • Core Rigs – including product comparisons such as Husqvarna vs. Diamond Products
  • … and more.

Repair and Service Agreements

Equipment malfunction can stall any project; make sure your rental company can provide troubleshooting and repair quickly enough to keep you on track.

Ideally, look for companies with the capacity to do repairs on-site to cut down turnaround times.

At The Pro Group, our manufacturer-certified equipment repair techs on staff can do almost all repair and maintenance. We also have factory-trained mechanics available for on-site troubleshooting.

Convenient Renewals

If you rent equipment, you’ll want to make sure you have guaranteed access to it until the end of your project.

Convenient monthly renewal calls help ensure you have equipment available for projects of any length, renewing monthly until you’re finished.


Construction Equipment Rental from Pro Equipment Rentals

Pro Equipment Rental is your rental source for a variety of construction tools and equipment in New England and beyond.

Whatever your project demands, we offer the tools, supplies, equipment and expertise you need to get it done.

We have a broad inventory of construction equipment, and a deep commitment to customer service.

View our catalogs or contact us to explore our inventory or learn more.

How to Work Safely Around Construction Propane Heaters

Though they are common at job sites, you can’t take propane heaters for granted. Letting down your guard increases the risk of gas leaks, fires, burns, and worst of all – an explosion. Review these safety tips to protect you and your team.

construction propane heater

Uses for Direct-Fired Heaters

Not only does this type of propane heater keep a work zone comfortable, it also keeps the surrounding area warm enough for tools and equipment, which might not operate well in colder temperatures. A construction propane heater can also help to cure drywall and concrete, making it suitable in building and remodeling. Other places where construction propane heaters work well are warehouses, agricultural buildings, and workshops.

General Safety Tips for Using Construction Propane Heaters

To use a propane heater safely, you must be aware of these dangers:

  • Burns
  • Explosions
  • Fire
  • Gas build-up
  • Leaks
forced air heater

Avoiding Burns

  • Always be conscious of the propane heater’s location. To prevent burns when working around one, long pants and long sleeves are recommended. When using a propane torch, you also need:
  • When working outside with a propane torch, work behind a wind-break. Wind can cause the flame to jump about, potentially burning someone or something.
  • After turning off a propane heater, allow it to cool down before touching it.

Avoiding Fire and Explosions

  • Understand where you can and can’t use the propane heater. Some heaters can only be used inside, while other types must only be used outdoors.
  • Only use a direct-fired propane heater when it’s on a level surface.
  • Don’t use a propane heater close to a propane tank or other flammable/explosive material.
  • Keep a general clearance area around the heater, and don’t allow others to place items near it.
  • Don’t use the heater in an enclosed area.
  • This may seem obvious, but don’t allow anyone to smoke around a propane heater.
  • After turning off the propane heater:
    • Allow it to cool down before moving it into storage.
    • Make sure the gas valve on the propane tank is completely closed.
    • Store the gas tank separately from the propane heater.

Avoiding Gas Build-Up

Ventilation is imperative when using a propane heater to avoid buildup of carbon monoxide or leaked propane gas. Consult a Pro Tool & Supply expert or the heater’s manual to tell you how much ventilation is required for the size of your propane heater.

Avoiding Gas Leaks

A propane gas leak can fill up a work area and push out the oxygen, overwhelming workers. It can also be an explosion hazard. If you smell gas or propane, immediately turn off the heater and investigate.
Here are a few ways to detect a leak before it becomes a big problem.

  • Only people who can detect smells and know the smell of propane should be around the heater. Propane manufacturers add a “rotten egg” odor to the gas to alert you in case of a leak.
  • A careless connection or worn-out part can cause a leak. Always check the connections to the propane heater, the hose, and the gas tank. You can also discover leaks by spraying a soap and water solution on the connected areas and looking for bubbles.
  • Escaping gas makes a hissing sound that can be heard if you listen carefully.

Not Sure which Construction Propane Heater is Best for You?

Our experts can help you decide from our selection of construction propane heaters. We also have propane heater rentals that you can try out by renting for a single day or more. Already know what you want? Request a quote or call us at 1-888-776-0007. Our representatives are ready to help you heat all your winter jobs.

Getting the Most Out of Your Work Tools and Equipment

We’re always glad to talk to our customers, though we know that replacing parts and repairing equipment aren’t usually your ideas of fun. For that reason, this article suggests ways to realize the maximum possible value from your equipment and tools. Guess what? When a tool or piece of equipment breaks, the culprits are often either Mother Nature or ourselves.

Mother Nature’s Messes

The most common environmental factors that affect a tool or piece of equipment are:

Obviously, it’s important to not leave your tools near water and mud, but also consider the long-term damage of exposing a tool to direct sunlight, freezing temperatures, and dust-laden environments. Thankfully, high-quality tools are designed to withstand the occasional splash of water and other elements. It’s the consistent negligence of a tool or equipment that can cause damage.

High-Quality Material Means Durability

Speaking of high-quality tools, when it’s time to purchase one, spend as much as you can afford. Although it’s natural to want to save money, don’t do so at the expense of quality. In general, the tools and equipment that are more expensive are that way because they are made with:

  • Long-lasting materials
  • Better design
  • Sturdier housing

For example, a tool with tougher housing can better resist the invasion of dust or moisture that will damage the moving parts inside. A better-designed tool is less likely to have its internal components damaged if it’s dropped.

What You Don’t Know Can Hurt Your Tools

Construction equipment and tools can also suffer damage at the hands of untrained or negligent operators. For example:

  • Using a tool at maximum power for an extended period of time can wear it out prematurely
  • Using tools or equipment in ways they weren’t designed to handle
  • Using incompatible accessories

It’s important to read the operation manual when you purchase a piece of equipment or a tool. It contains crucial information about:

  • Calibration
  • Maintenance
  • Safety warnings
  • Troubleshooting

If you’re unsure of anything, request a demo with one of our experts.

Tips to Extend Tool Life

Hanging on to your tools for a long time can seem like a losing battle against Father Time and Mother Nature. However, your ammunition is to be proactive in cleaning, maintenance, and storage.

Regular Maintenance

Get in the habit of starting the workday with a daily checklist of your machinery. This can help you spot worn-out parts. You’ll have time to get the part replaced, saving you from unexpected breakdowns.

Other maintenance routines include:

  • Servicing and calibrating tools and equipment on schedule
  • Maintaining fluid and oil levels
  • Greasing parts
  • Cleaning away dust, dirt, and mud
  • Replacing fuel filters, chains, and belts

Pay Attention

Working at a fast pace can be the enemy of your tools and equipment because you might not notice what’s right in front of you:

  • Noise—If you hear any strange noises, like grinding, popping, or whining, stop using the machine and get it checked out immediately. Make sure employees know to report unusual noise or behavior of equipment.
  • Wear and Tear—Replace worn-out drill bits and saw blades. Using them causes the tool to work harder, wearing it out sooner.
  • Heat—When you’re working with a tool, feel the battery pack frequently. If it’s hot, stop using the tool and let it cool down. This also applies to the gear box of any machine you’re operating.

Before leaving the worksite for the day, make sure all tools are stored away or at least covered up to protect them from dust and dirt. If possible, keep tools and equipment in a temperature-controlled area.

Pro Tool & Supply’s Parts and Repair Shop

Over time, even well-made tools and equipment need repairs. Whether your equipment was purchased with Pro Tool & Supply or not, our equipment parts and repairs departments are available to you. It could only be necessary to replace a broken or worn-out part, however Pro technicians can check the condition of the surrounding parts, as they could have caused the problem in the first place. Pro experts regularly receive the latest information from manufacturers, so they can keep you informed of warranty and repair issues.

We are proud to boast an impressive lineup of solutions to keep you on schedule, including:

  • Factory-trained repair shop technicians
  • Extensive inventory of OEM parts
  • Additional services, such as replacement rental equipment and 24/7 emergency service
  • Fast shipping for special parts orders from manufacturers
  • On-site servicing for large pieces of equipment

Contact Us for Parts and Repairs

We’d love to get to know you at Pro Tool & Supply. We stock construction equipment and tool parts from Bosch, DeWalt, Husqvarna, and hundreds more. Our OEM parts specialists are readily available by phone or email at parts@theprogroupinc.com to discuss your specific equipment.

If you have equipment in need of repair, our repairs department expert mechanics can help. We provide on-site or in-house repair services for brands like Chicago Pneumatic, Genie, and Magnum – just to name a few of the dozens of brands we can work on. Contact us or call 1-888-776-0007 to speak with an expert.

Indispensable on the Job: Industrial Air Compressors and Industrial Air Tools

If you work in the construction industry, you already know that residential air compressor and air tools aren’t going to cut it. The demands of your job require something that’s durable and dependable.

This article covers the basics of a specific type of air compressor – the portable industrial air compressor. This type of compressor is permanently attached to a trailer that can be towed by a pickup truck and powers multiple industrial air tools.

Using a Portable Industrial Air Compressor

On a construction jobsite with limited access to an electrical power source, it’s quite common to find a portable industrial air compressor that runs on diesel fuel. This section provides the general steps for running a portable diesel air compressor; for specifics, check with a Pro Group expert or request a demo.

Safety Gear

  • Besides wearing goggles and closed-toe shoes, you should also wear ear muffs for protection from the noise of the diesel motor and air tool.
  • Place wheel chocks behind the portable air compressor’s wheels to prevent it from rolling during operation.

Maintenance Check

  1. Check the level of all fluids:
    • Compressor oil
    • Coolant
    • Engine oil
    • Fuel level
  2. Check the inside of the compressor for debris, loose connections, and the position of safety covers and guards.

Running the Air Compressor

  1. Turn the battery switch on.
  2. Open the release valve.
  3. Start the diesel motor.
  4. Close the release valve.
  5. Turn on the compressor and wait for the air tank to fill up. When the air pressure gauge indicator stops moving, the air in the tank is fully pressurized.
  6. Attach the tool hose to the regulator valve.
  7. Connect the air tool to the hose.
  8. Adjust the air compressor regulator to match the tool’s pressure.

Tips:

  • While running the air compressor, monitor the pressure gauges. The air pressure must remain below the maximum pressure allowed for the air tool.
  • If you switch tools, you might need to adjust the pressure again.
  • When you are finished, release the drain valve.

Standard Industrial Air Tools

The portable industrial air compressor can provide power to the following types of industrial air tools:

  • Chipping Hammers—You can use the multipurpose chipping hammer for light chipping or heavy cutting.
  • Paving Breakers—Performing the same vertical demolition as a jackhammer, a paving breaker can be found in a variety of sizes that make it suitable for small jobs all the way up to heavy duty concrete demolition.
  • Rivet Busters—Originally used for cutting and forming metal rivets, the rivet buster is relatively light, but has the same power as a heavier jackhammer. You can use it for vertical, horizontal, and overhead work.
  • Rock Drills—You can use a rock drill to drill vertically in concrete or underground in bench mining. It’s also used for drilling blast holes and quarry work.
  • Rotary Drills—Another versatile tool, the rotary drill can be used vertically or horizontally to drill holes in brick, rock, and other masonry. You can also use it to chip, scarify, and clean welds.

The Many Advantages of Industrial Air Tools

Compared to an electrical tool, industrial air tools last longer. They don’t generate heat while running, which is more comfortable for the operator. The lighter weight of the air tool also lessens operator fatigue and risk of long-term injury.

There’s a safety advantage as well. If an air hose springs a leak, no contaminants are released, as happens with hydraulic systems. Also, air tools do not pose a risk of fire or electrical shocks.
 

Questions About Air Compressors or Air Tools?

Contact Pro Tool & Supply if you have a question about using industrial air tools or portable industrial air compressors. We have air tools and air compressors for purchase and for rent, and our experts can answer your questions and help you decide on the right tool for your specific application.

Backhoe vs. Mini Excavator: Which is Right for Your Job?

Mini excavators have grown in popularity and can be found in a wide variety of dimensions and specifications. The term “mini excavator” (also referred to as a “compact excavator”) is a bit misleading. Although smaller in scale than the backhoe, the hydraulic mini excavator (hydraulics being used to control the excavator arm) is very close in matching its capabilities.

A typical backhoe is a tractor with the backhoe arm on one end and a loader on the other end, so it’s often called a “backhoe loader.” The backhoe is the mainstay of the construction and land development industries because it offers great flexibility of work. However, the mini excavator can handle nearly all the jobs that a backhoe can, such as:

  • Breaking and removing asphalt or concrete
  • Demolition
  • Digging
  • Land clearing
  • Lifting
  • Loading
  • Road and bridge work
  • Transporting building materials or work tools
  • Tree harvesting, transport, and planting
  • Trenching
  • Utility installation

Because of its smaller dimensions and lighter weight, the mini excavator is more appropriate for utility trenching, small-scale landscaping projects, and interior demolition. Meanwhile, the backhoe is in its element when plowing away snow or grading a road.

Something that makes all the above applications possible for the backhoe or mini excavator is the ability to switch out the bucket as well as use different attachments. Indeed, both types of machines can accommodate:

  • Augers
  • Breakers
  • Grapples
  • Hammers
  • Rock buckets
  • Thumbs

However, when looking at the backhoe vs. mini excavator, it is crucial to consider your specific job needs. A few factors to consider include:

  • Size and terrain of the jobsite
  • Available room to work
  • Jobsite restrictions

Size and Terrain of the Jobsite

One of the advantages of a backhoe is that, being a tractor (wheeled instead of tracked), it can travel quickly – up to 25 miles per hour. For a very large job site in which a machine needs to travel across multiple acres during the day, this is an important advantage. The faster vehicle can reach more work areas more quickly, thus getting more done during the day.
On the other hand, the wheeled backhoe may not do well in an area that is very hilly or sloped. A mini excavator, which uses tracks instead of wheels, is the safer alternative in those situations.
 

Available Room to Work

Although the backhoe is the workhorse of the construction and land development industries, the fact that it is so large can be a drawback for some work areas. Imagine using a backhoe to remove the concrete surface of a narrow city alleyway, and you get the picture.

One of the reasons why the mini excavator is becoming so popular is because it can fit into places too small for the backhoe, even going through doors and gates. The mini excavator is particularly appropriate for indoor demolitions or areas already established, such as a residential backyard garden or public park.
 

Jobsite Restrictions

Backhoe Loader

In some areas, it may not be possible to use a large trailer truck to transport a backhoe to the jobsite. Some roads cannot support the weight of the transport truck with the backhoe, or a special permit might be required. A hydraulic mini excavator can be transported on a trailer and towed with a standard pickup truck.

Because of its weight and large treads, the backhoe may also be inappropriate for areas where there are ecological or aesthetic concerns. The mini excavator is much easier on the ground beneath it, especially if special rubber tracks are used instead of steel tracks.

If a machine is needed indoors or in an area with noise restrictions, the electric mini excavator has no emissions and is five times quieter than its diesel version. Although they sound exotic, electric mini excavators are quite common and easily available for rent or purchase.

Still Need Assistance?

If you are not sure whether the backhoe or mini excavator is the right machine for your job, contact Pro Tool and Supply. We have experts available to answer your questions and help you narrow down your choices.

Reciprocating Saw Uses and Safety Tips

As the ultimate demolition tool, a reciprocating saw is a must-have in any workshop. This versatile piece of equipment uses up-and-down motions to cut through just about anything, from backyard shrubbery to metal. Add in detachable blades and easy handling and you’ll see why reciprocating saws are one of the best all-around tools for both the home and the construction site.

Reciprocating Saw Uses and Safety

Reciprocating Saw Uses

While reciprocating saws are demolition tools by nature, they are useful in a variety of applications. As a professional contractor, you’ll get many uses out of a reciprocating saw:

  • Opening walls. Reciprocating saws allow you to create even openings in walls and drywall. This will let you easily access wires or pipes during renovation projects.
  • Fitting windows. Similar to opening walls, a reciprocating saw can help to cut down and fit windows.
  • Cutting through nails. Should you encounter a pin or nail that is difficult to remove, a reciprocating saw can help. Simply cut the head rather than attempting to pull it out.
  • Plumbing and PVC work. When it comes to piping, a reciprocating saw is the most effective tool. A reciprocating saw will cut through PVC easily including pipes found in awkward positions.
  • Slicing through difficult materials. Reciprocating saws are versatile and allow you to cut through some of the most difficult materials. These include wood, hard plastic, and even metal.
  • Cutting branches. When removing branches or small trees, a reciprocating saw is the tool for the job. Coarse blades make this saw excellent at cutting wood with minimal effort.

Additionally, the lightweight and easy-to-use nature of the reciprocating saw makes it ideal for overhead work both indoors and outdoors.

Reciprocating Saw Blade Types

For your reciprocating saw to run at optimal efficiency, it is critical to use the right blade. Different blades are available based on the application, so it is important to match the blade to the right job:

  • High Carbon Steel (HCS). These blades are perfect for “soft” materials, such as plastics, wood, and laminated particleboard.
  • High Speed Steel (HSS). Offering fully-hardened steel blades, the HSS is ideal for cutting metals, aluminum, and other non-ferrous metals.
  • Bi-Metal (BiM). The BiM is a combination of HCS and HSS. It is highly flexible and is good for the most demanding of applications. This would include wood with nails and other scenarios where there is a risk of breakage.

In addition to material type, you should also consider the blade’s teeth per inch (TPI) when making your selection. The number of saw teeth per inch on a blade changes how fast the saw cuts. For example, blades with a lot of small teeth will cut more slowly than a blade with fewer, larger teeth. The TPI of a blade will range from 3-18. Blades falling in the lower end of this range will be fine for cutting wood and “softer” materials, however a TPI of 14-18 is needed for cutting metal.

Reciprocating Saw Uses and Safety

Reciprocating Saw Safety

Reciprocating saws are powerful tools, and during use, it is important to take proper safety precautions. The following tips will allow you to operate your reciprocating saw safely:

  • Maintain your balance. Always use two hands when operating your reciprocating saw. Keep the grips clean and free of dirt and dust. Inspect the blades prior to using the saw to make sure they are sharp enough for the required job.
  • Maintain electrical safety. Never use an electric reciprocating saw during wet conditions. Use the saw with Ground Fault Circuit Interrupter (GFCI) protected outlets or extension cords. Check the tool cord for damage prior to use, and if a problem is detected, do not use it.
  • Wear personal protective equipment. Always wear the proper gloves, dust mask, ear covers, and safety goggles when using a reciprocating saw. Slip-resistant footwear is also recommended.
  • Ensure proper blade settings. Never set a blade to go further than 0.32-0.64 cm deeper than the material that you cut.
  • Turn the saw off to perform maintenance. When changing or cleaning reciprocating saw blades, turn off and unplug the tool. Never put the saw down until the motor has completely stopped.

At Pro Tool & Supply, we are proud to offer an extensive supply of reciprocating saws for sale and rent. Our experts are available to help you select the right saw and blade, and we’ll ensure that you feel comfortable with operation. Contact us today to learn more.

Loader Low-Down: Skid Steers vs. Track Loaders

Versatile and rugged, loaders are construction site workhorses. Their adaptability and a long line of compatible attachments make a skid steer or compact track loader indispensable for many jobs.

While both wheel-driven skid loaders and their track-driven counterparts can be used in a variety of applications and work environments throughout the year, each has distinct advantages under certain conditions.

Skid Steer Advantages

If you’re buying rather than renting, a skid steer produces its first benefit even before it’s delivered, checking in with a sticker price that is often 30 percent or so lower than a track loader of similar capacity. Tires are cheaper to replace than tracks, so ongoing operating costs can be less of a hit as well, especially when working on hard surfaces. Asphalt and concrete are kinder to tires than they are to tracks, so if most of a company’s jobs involve working on hard surfaces, a skid steer may be the better option.

Consider choosing a skid steer rental or purchase under these conditions:

  • Confined Work Spaces – Wheels allow skid steers to make tight turns. They can “pirouette” or pivot on one wheel, dragging – that is skidding, hence the name – the real wheels through a 0-degree turn radius. When walls, drop-offs, or other space confinements prevail, this turn-on-a-dime capability can make all the difference.
  • Speed – In addition to making faster and shorter turns, skid steers also hit top working speeds of 10 to 14 miles per hour. This is about 40 percent faster than comparable track loaders. A few additional miles per hour may not sound like much, but it adds up, and the faster the job gets done, the more quickly you can move onto the next project.
  • Portability – Because they don’t require the understructure on which track loaders rely, skid steers are lighter. They can be easily loaded and transported from site to site.

Track Loader Advantages

A skid steer likely is the best choice when surface and weather conditions are ideal, but when the going gets tough, a track loader could be the better option. They are best when tackling muddy, rocky, and slippery jobsites. Their tracks creating several benefits when working surfaces are challenging:

  • Weight Distribution – Though their undercarriage components make track loaders heavier than comparable skid steers, the entire bottom of each track comes into contact with the ground. This greater surface contact spreads out the weight, so the machines do not become bogged down in mud or sink in snow. Tracks also tread more lightly than tires, causing less damage to landscaping and less time required for site maintenance.
  • Accessibility and Maneuverability – Better traction on mud, sand, and ice allows track loaders to operate where their wheeled counterparts cannot. They may be able to recommence work immediately after a downpour, when drier conditions would be needed in order to bring in wheeled loaders. Greater productivity and shorter completion times equal greater profits.
  • Track Life – While it is true that tires are cheaper than tracks, tracks offer significantly more operating hours than tires. They cost a bit more to replace, but you don’t have to replace them nearly as often if working on softer surfaces.

Snow Removal

skid steer vs trackloader

With winter in full swing, loaders can be adapted for use in plowing or blowing snow. As is often the case, the jury is still out on whether tracks or skids are best suited for the job. Greater tractive power may allow a track loader to push and clear larger loads on level surfaces.

However, a wheeled skid steer’s heavier ground bearing will prevent slipping when plowing on inclines. The higher per-square-inch weight on the tires also bears on the blade, creating superior scraping power for one-pass snow removal.

Get the Right Equipment for Your Next Job

The Pro Group’s expert sales team can help you choose from our extensive line of loaders for sale or rent. Give us a call or request a quote for advice on the right loader for your application.

Search For Products

Product has been added to your cart